Enabling Okta Authentication from NGINX
I had been recently tasked enabling Okta authentication to all the users who use a private Jbrowse 2 instance. This was necessary to achieve three different goals
- Enhance Security and allows only authorized users to access the Jbrowse 2 instance
- Integrate Jbrowse 2 with into multiple apps with a single sign-on (SSO)
- Reduce the traffic through the VPN tunnel especially when using heavy data such as alignment tracks and other genomic files
I discovered a way to enable authentication to all visitors to a web-server with NGINX and vouch-proxy. I discovered this blog post by Aaron Parecki on the Okta Developer blogs. After a few tries I found a basic configuration that worked for NGINX and vouch-proxy.
First you need to create a free Okta developer account at https://developer.okta.com/. Okta allows you to use either your Github or Google accounts to create a new account.
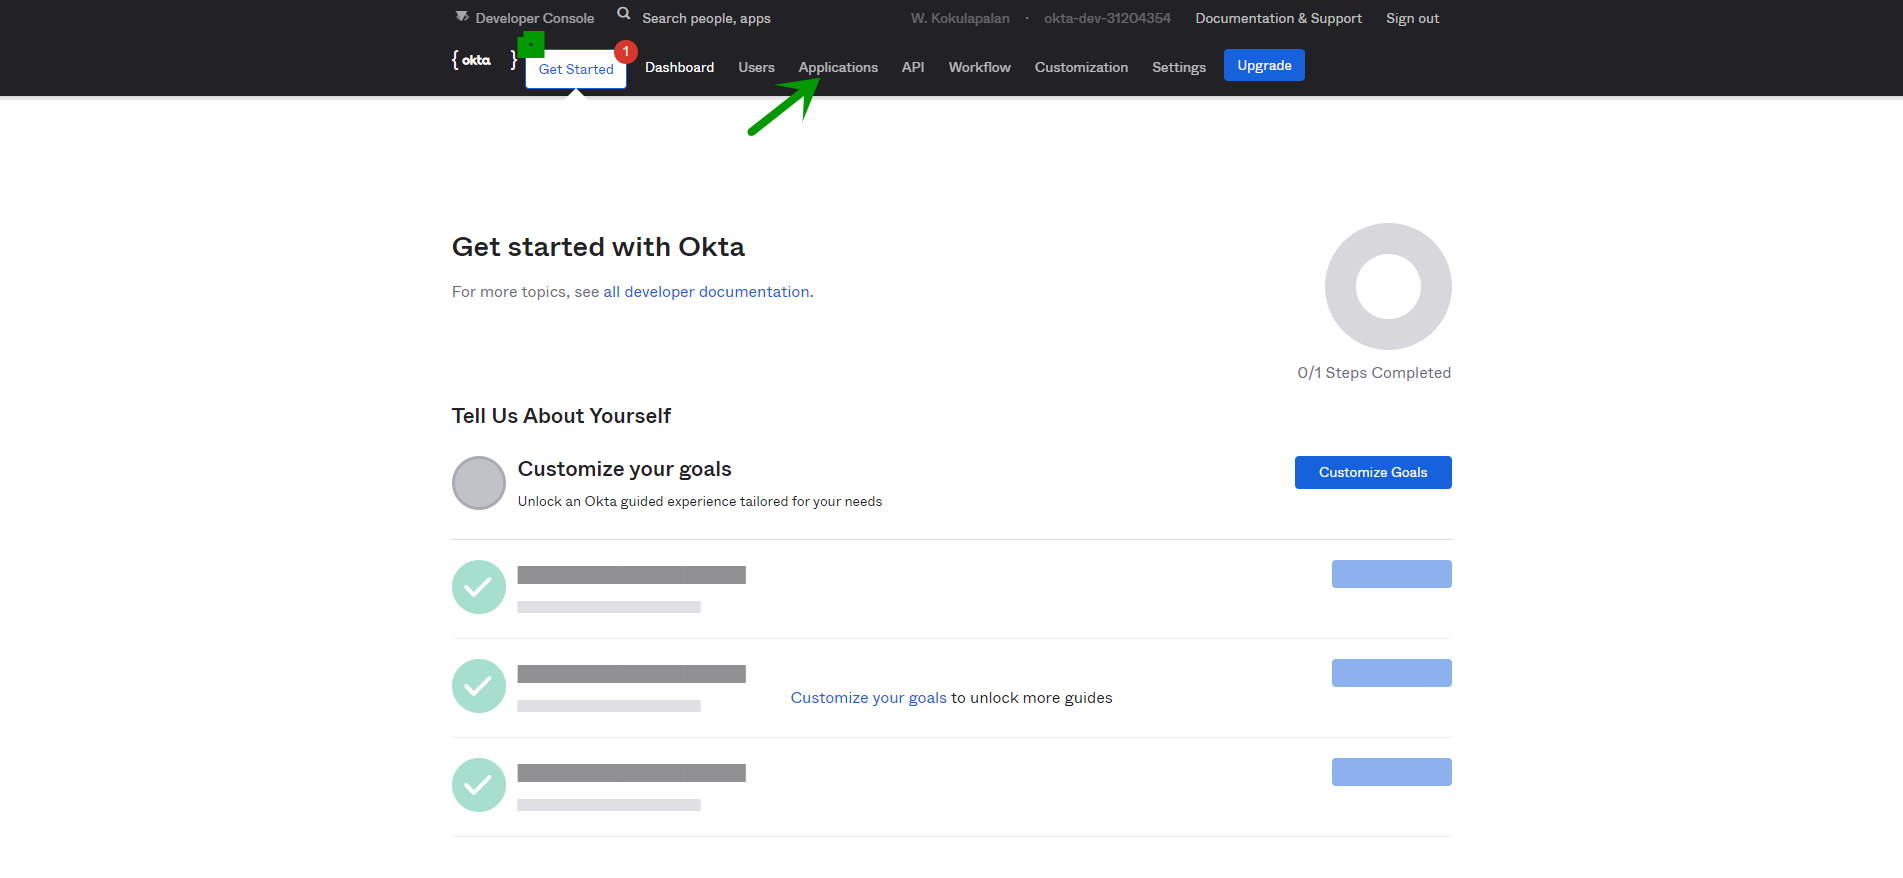
Login to Okta Developer Dashboard and create a new application
- Click on the Applications that is indicated by the green arrow
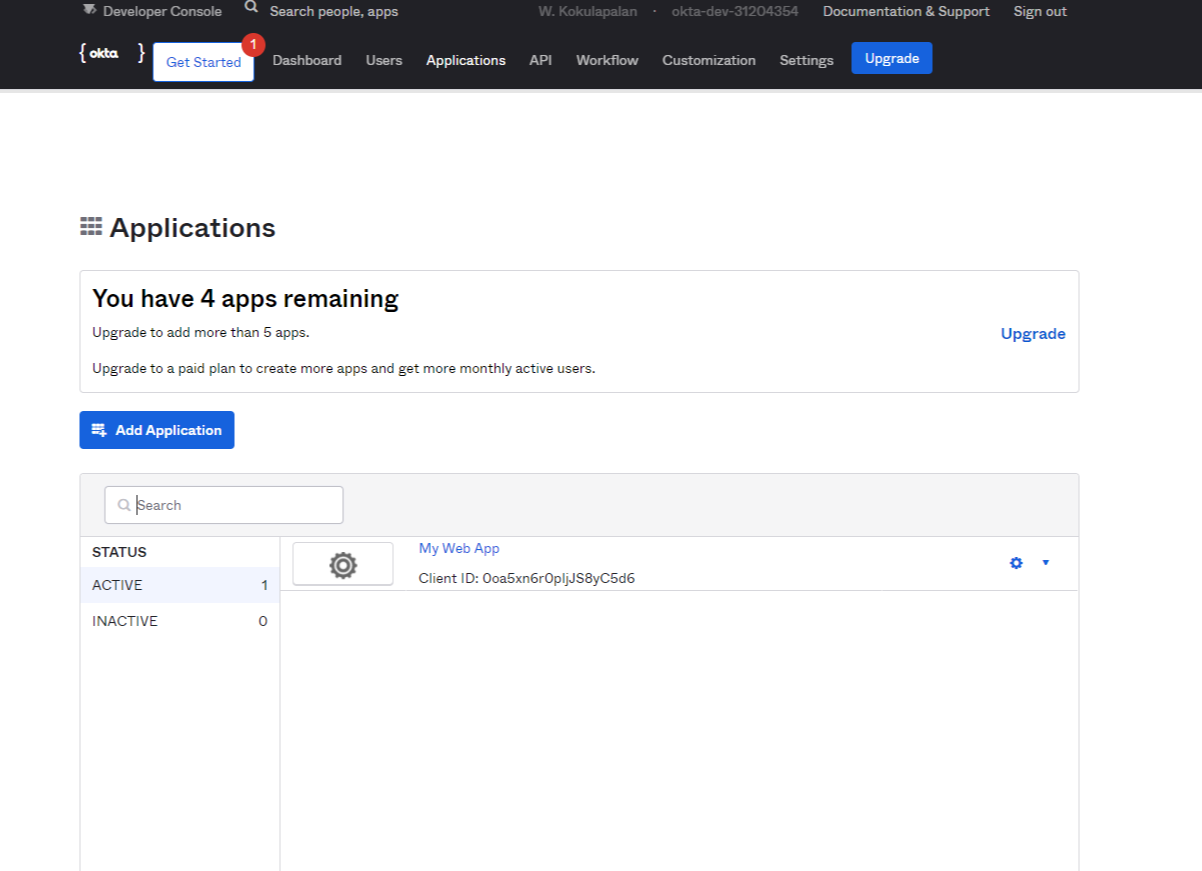
- Click on the Add Application button
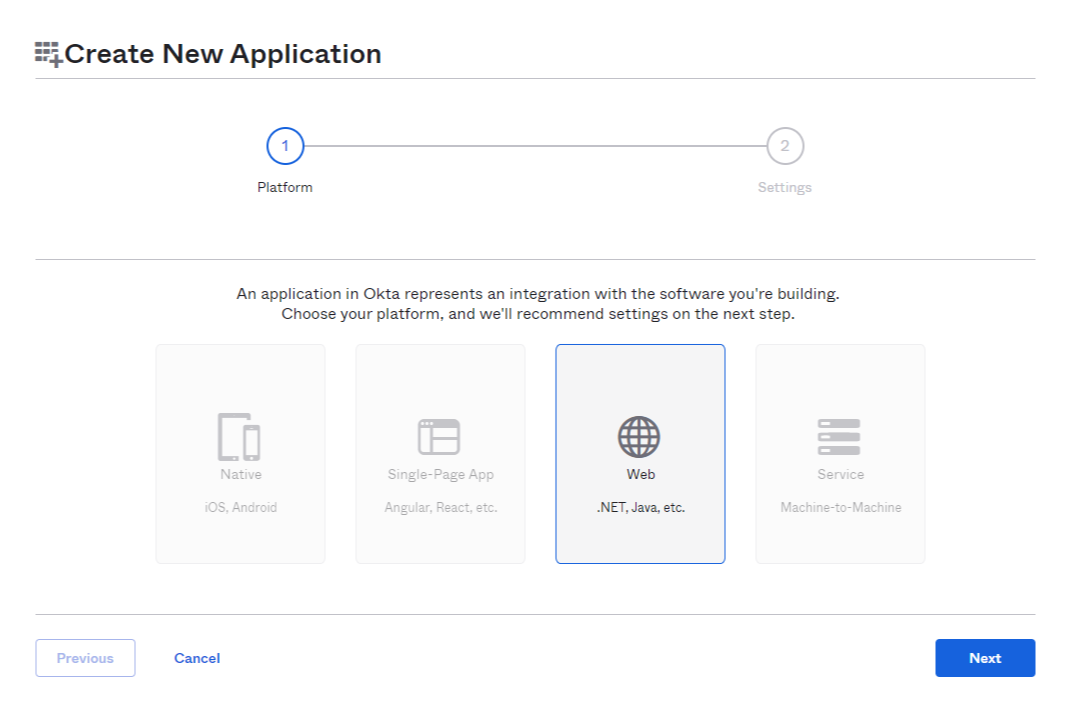
- Select Web type application as shown below and click Next
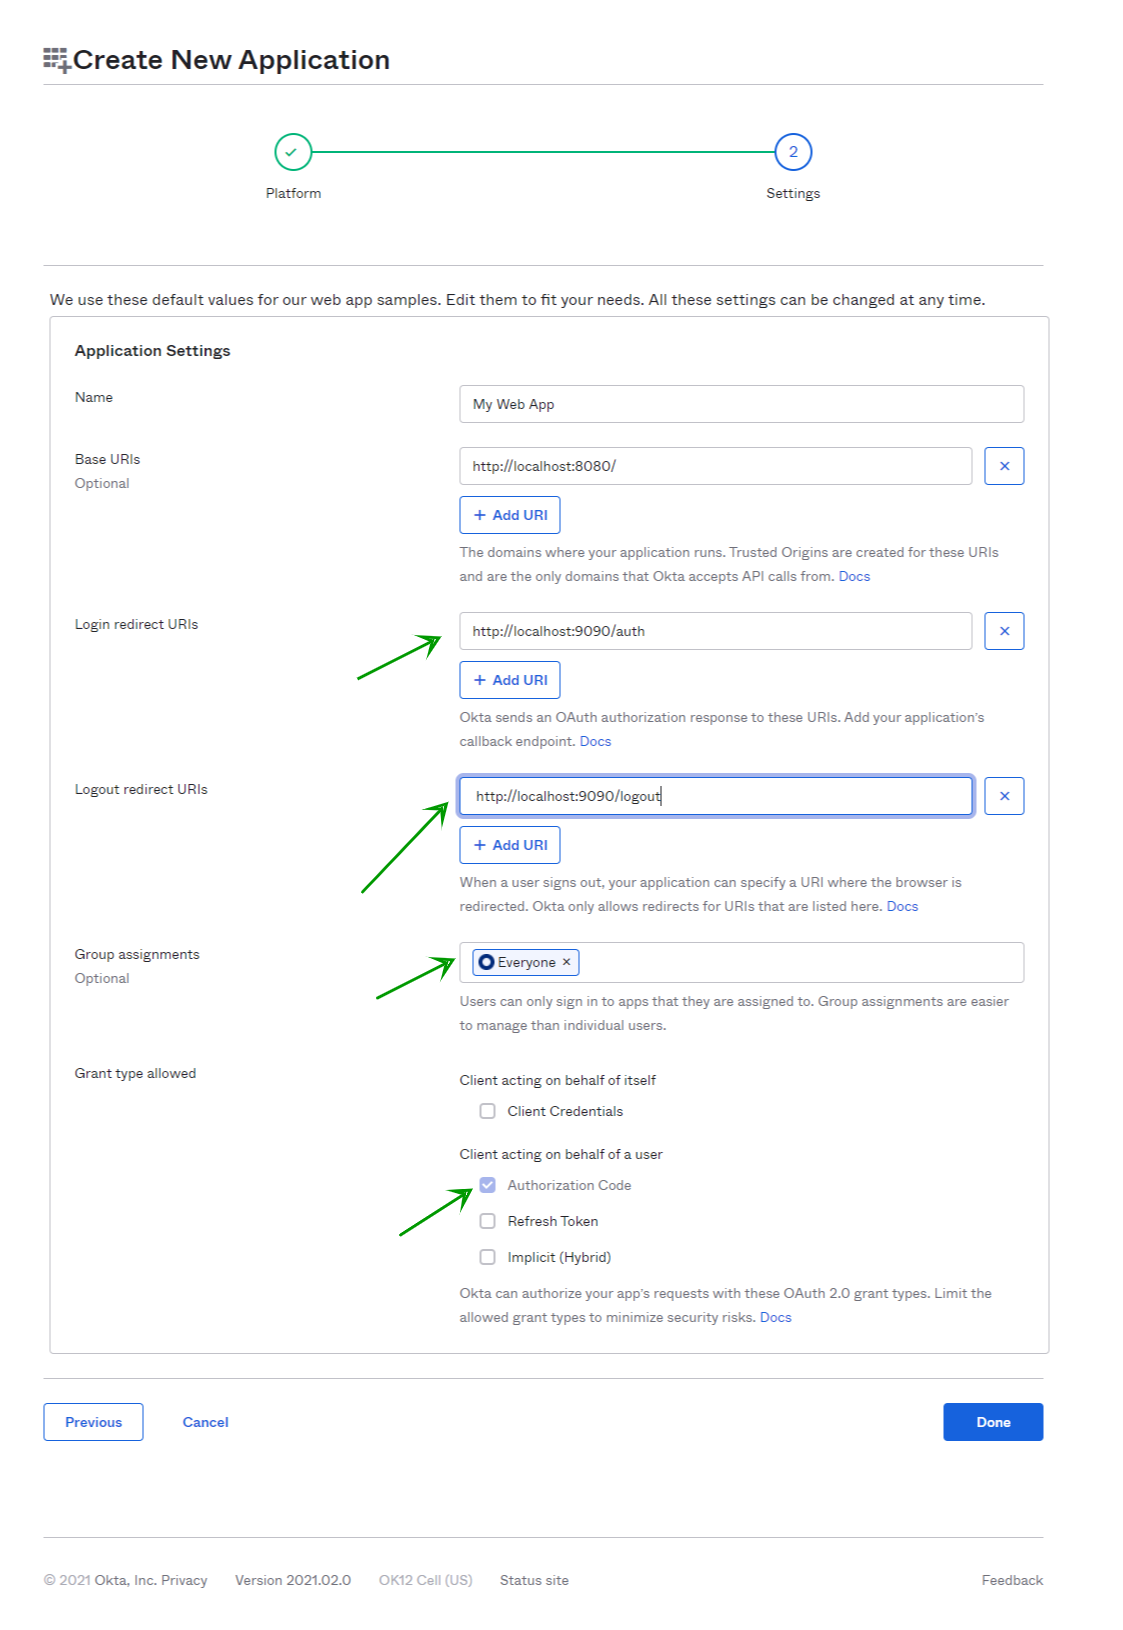
- Add the following details to the application form
- Login redirect URIs:
http://localhost:9090/auth - Logout redirect URIs:
http://localhost:9090/logout - Group assignments (default):
Everyone - Grant type allowed (default):
Authorization Code
- Login redirect URIs:
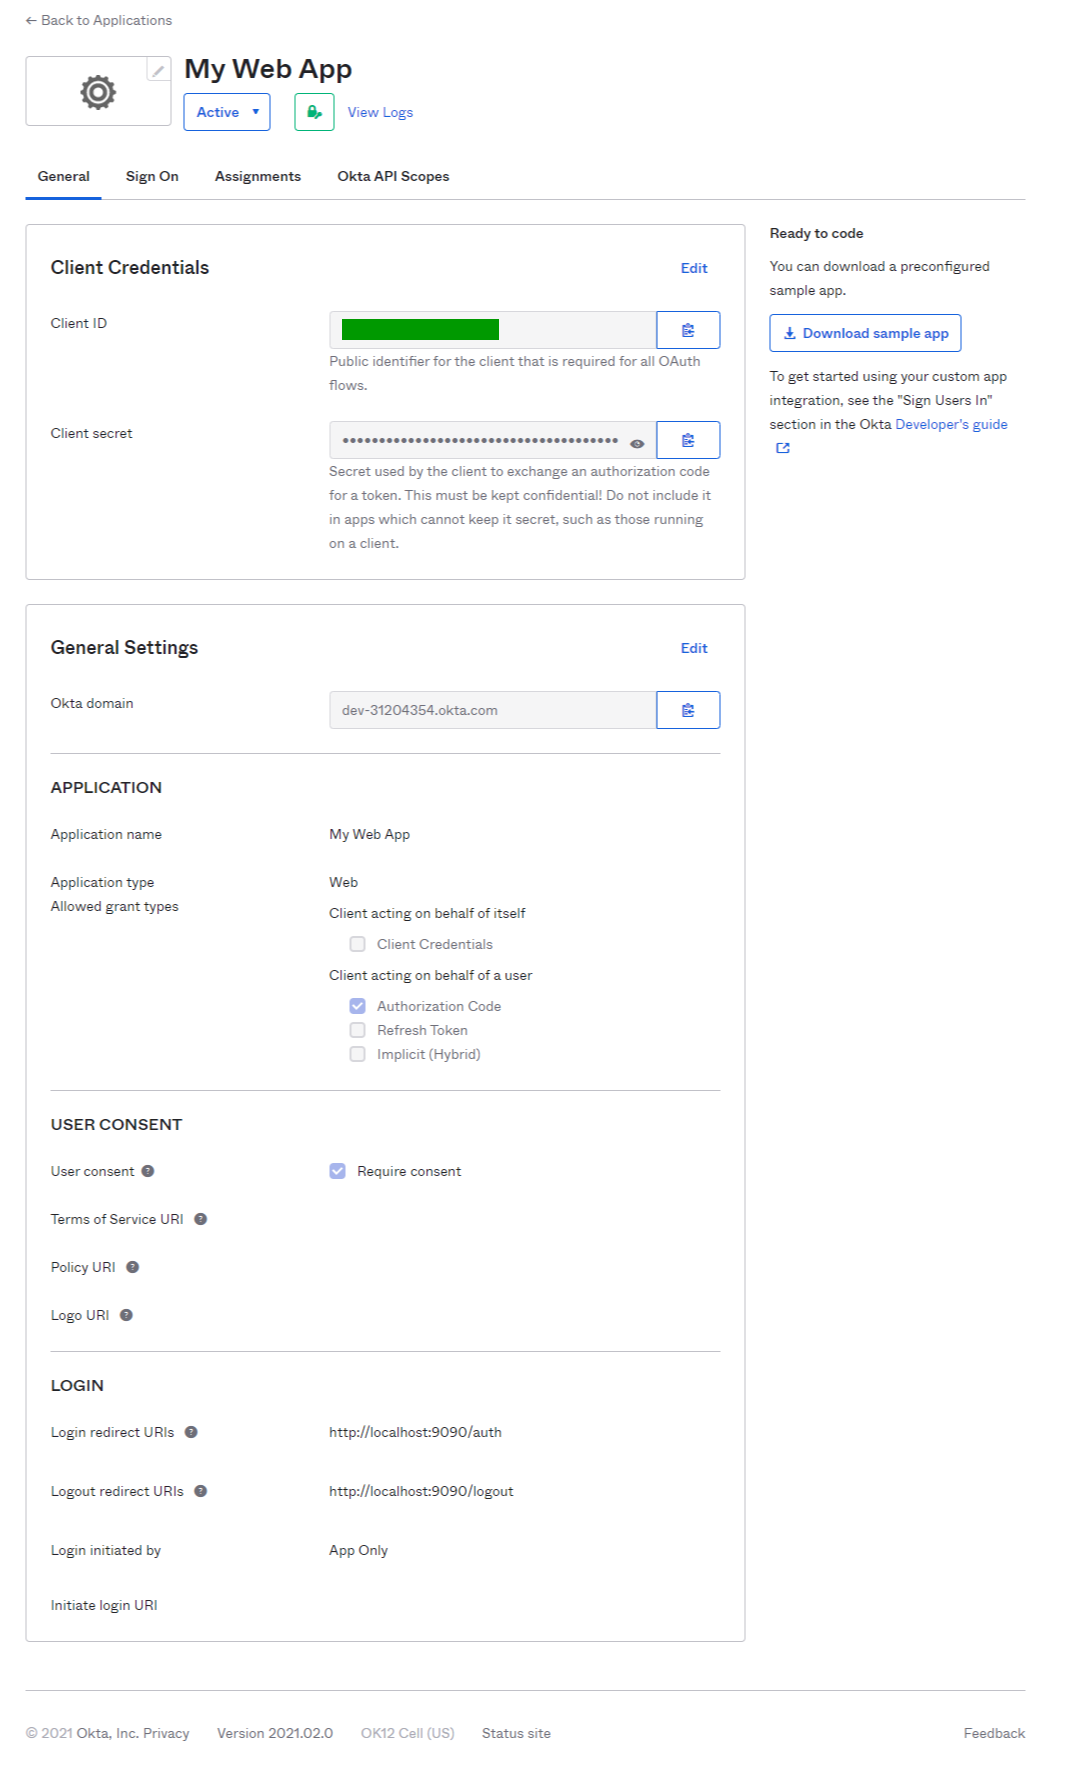
- Note down application Credentials. We will need it to configure vouch-proxy later
- Client ID
- Client secret
Install and Configure Nginx in Ubuntu
- The Nginx is part of the default distribution so the easy way to install is using apt-get or apt
1
     sudo apt install nginx
- This creates a set of config files in the /etc/nginx directory
1 2 3 4 5 6 7 8 9 10 11 12 13 14 15 16 17 18 19
ll /etc/nginx/ total 72 drwxr-xr-x 8 root root 4096 Feb 13 16:02 ./ drwxr-xr-x 110 root root 4096 Feb 13 16:31 ../ drwxr-xr-x 2 root root 4096 Apr 21 2020 conf.d/ -rw-r--r-- 1 root root 1077 Feb 4 2019 fastcgi.conf -rw-r--r-- 1 root root 1007 Feb 4 2019 fastcgi_params -rw-r--r-- 1 root root 2837 Feb 4 2019 koi-utf -rw-r--r-- 1 root root 2223 Feb 4 2019 koi-win -rw-r--r-- 1 root root 3957 Feb 4 2019 mime.types drwxr-xr-x 2 root root 4096 Apr 21 2020 modules-available/ drwxr-xr-x 2 root root 4096 Feb 13 16:02 modules-enabled/ -rw-r--r-- 1 root root 1490 Feb 4 2019 nginx.conf -rw-r--r-- 1 root root 180 Feb 4 2019 proxy_params -rw-r--r-- 1 root root 636 Feb 4 2019 scgi_params drwxr-xr-x 2 root root 4096 Feb 13 16:02 sites-available/ drwxr-xr-x 2 root root 4096 Feb 13 16:02 sites-enabled/ drwxr-xr-x 2 root root 4096 Feb 13 16:02 snippets/ -rw-r--r-- 1 root root 664 Feb 4 2019 uwsgi_para - We will have to edit the Nginx config file to add the configuration for vouch-proxy to integrate Okta Authentication.
- The default server block is located at
/etc/nginx/sites-enabled/default - I decided to add authentication to all users for all the sites so I edited the default site, but one can add aa new file for a different server config
- I also decided to work with http instead of https to make things easier for this tutorial, but in a production setting it’s essential to use https with SSL.
- The default server block is located at
- Default Server Block Configuration of Nginx (After Removal of commented lines)
1
2
3
4
5
6
7
8
9
10
11
12
13
14
15
16
     server {
         listen 80 default_server;
         listen [::]:80 default_server;

         root /var/www/html;

         # Add index.php to the list if you are using PHP
         index index.html index.htm index.nginx-debian.html;

         server_name _;

         location / {
             try_files $uri $uri/ =404;
         }

     }
-
Add the vouch-proxy validate configuration to the default server block
1
2
3
4
5
6
7
8
9
10
11
12
13
14
15
16
17
18
19
20
21
22
23
24
25
26
27
28
29
30
31
32
33
34
35
36
37
38
39
40
41
42
43
44
45
46
47
48
49
50
51
52
53
54
55
56
     server {
         listen 80 default_server;
         listen [::]:80 default_server;

         root /var/www/html;

         # Add index.php to the list if you are using PHP
         index index.html index.htm index.nginx-debian.html;

         server_name _;

         ## Start of vouch-proxy validate block
         ## The line below send all unauthorized requests through vouch-proxy to validate
         auth_request /validate;

         ## Start of the Validate block to process requests
         ## This was taken from vouch-proxy default config
         location = /validate {

             # forward the /validate request to Vouch Proxy
             proxy_pass http://127.0.0.1:9090/validate;
             # be sure to pass the original host header
             proxy_set_header Host $http_host;

             # Vouch Proxy only acts on the request headers
             proxy_pass_request_body off;
             proxy_set_header Content-Length "";

             # optionally add X-Vouch-User as returned by Vouch Proxy along with the request
             auth_request_set $auth_resp_x_vouch_user $upstream_http_x_vouch_user;

             # these return values are used by the @error401 call
             auth_request_set $auth_resp_jwt $upstream_http_x_vouch_jwt;
             auth_request_set $auth_resp_err $upstream_http_x_vouch_err;
             auth_request_set $auth_resp_failcount $upstream_http_x_vouch_failcount;
         }

         # if validate returns `401 not authorized` then forward the request to the error401block
         error_page 401 = @error401;

         location @error401 {
             # redirect to Vouch Proxy for login
             return 302 http://localhost:9090/login?url=$scheme://$http_host$request_uri&vouch-failcount=$auth_resp_failcount&X-Vouch-Token=$auth_resp_jwt&error=$auth_resp_err;
             # you usually *want* to redirect to Vouch running behind the same Nginx config proteced by https
         }


         location / {
             # First attempt to serve request as file, then
             # as directory, then fall back to displaying a 404.
             try_files $uri $uri/ =404;

             ## This lines allows for tracking unique authenticated users from the application
             proxy_set_header X-Vouch-User $auth_resp_x_vouch_user;
         }
     }
- You will have to restart the nginx service after you have modified the file and made the relevant changes
- If you try to access the website it would throw an error now because vouch-proxy is not installed or running on 9090
Setup vouch-proxy and start the service
- Easiest way to use vouch-proxy is to use the docker image provided.
- Installation instructions are available at https://github.com/vouch/vouch-proxy for the brave souls
- Make a config directory for vouch-proxy at any location
- E.g.
~/vouch-proxy/config
- E.g.
- Create a file called
~/vouch-proxy/config/config.ymland add the following configuration to the file for initial testing1 2 3 4 5 6 7 8 9 10 11 12 13 14 15 16 17 18 19 20 21 22 23 24 25 26 27 28 29 30
# vouch config # bare minimum to get vouch running with OpenID Connect (such as okta) testing: true listen: 0.0.0.0 # VOUCH_LISTEN port: 9090 # VOUCH_PORT vouch: allowAllUsers: true cookie: # allow the jwt/cookie to be set into http://yourdomain.com (defaults to true, requiring https://yourdomain.com) secure: false # vouch.cookie.domain must be set when enabling allowAllUsers domain: localhost oauth: # Generic OpenID Connect # including okta provider: oidc client_id: XXXXXXXXXXXXXXXXXXXX client_secret: YYYYYYYYYYYYYYYYYYYYYYYYYYYYYYYYYYYYYYYY auth_url: https://dev-ZZZZZZZZ.okta.com/oauth2/default/v1/authorize token_url: https://dev-ZZZZZZZZ.okta.com/oauth2/default/v1/token user_info_url: https://dev-ZZZZZZZZ.okta.com/oauth2/default/v1/userinfo scopes: - openid - email callback_url: http://localhost:9090/auth
- This configuration allows you to test if the authentication flow is working correctly and manually advance the steps after authentication
- Run the docker image for vouch-proxy
1
2
3
4
5
6
7
     # docker stop vouch-proxy  ## Needed if restarting the daemon
     # docker rm vouch-proxy ## Needed if restarting the daemon
     docker run -d \
         -p 9090:9090 \
         --name vouch-proxy \
         -v ${HOME}/vouch-proxy/config:/config \
         voucher/vouch-proxy
- Now you are all set to see if the authentication workflow is working as intended
- Open a incognito or private window to test and load http://localhost. It should show an okta login screen as shown below
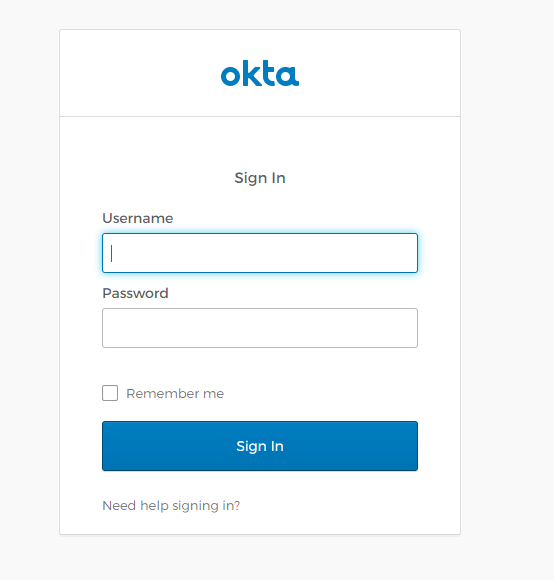
- Enter your credentials and Sign In to Okta
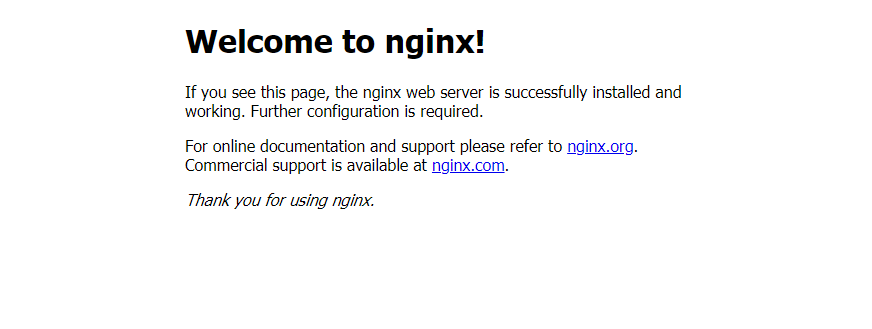
- The page should automatically direct you to http://localhost and voila you should be able to see the default Nginx screen below